网站首页 程序开发 centos7.7使用python3.7+Flask+uWsgi+iview的方式部署生产环境
一、更新系统
# yum install epel-release
# yum update
# yum install vim wget
二、安装python3.7
[root@study ~]# cat /etc/redhat-release
CentOS Linux release 7.7.1908 (Core)

[root@study ~]# yum install gcc make zlib zlib-devel openssl openssl-devel libffi-devel bzip2-devel ncurses-devel gdbm-devel readline-devel xz-devel sqlite-devel tk-devel -y
[root@study ~]# wget https://www.python.org/ftp/python/3.7.4/Python-3.7.4.tgz //下载文件
[root@study ~]# tar -zxvf Python-3.7.4.tgz //解压文件
[root@study ~]# cd Python-3.7.4/ //进入Python-3.7.4解压目录
[root@study ~]# ./configure prefix=/usr/local/python3 //这里安装在/usr/local/python3 目录下,有需要安装在其他地方的则修改目录为想要安装的位置
[root@study ~]# make //编译
[root@study ~]# make install //执行安装
[root@study ~]# ln -s /usr/local/python3/bin/python3 /usr/bin/python3 //安装完成就配置软连接
[root@study ~]# ln -s /usr/local/python3/bin/pip3 /usr/bin/pip3 //安装完成就配置软连接
最后一步验证
[root@study ~]# python3 -V
Python 3.7.4
[root@study ~]# pip3 -V
pip 19.0.3 from /usr/local/python3/lib/python3.7/site-packages/pip (python 3.7)

返回了安装的版本信息则说明安装成功,接下来可以升级pip3

[root@study ~]#pip3 install --upgrade pip
Collecting pip
Downloading https://files.pythonhosted.org/packages/30/db/9e38760b32e3e7f40cce46dd5fb107b8c73840df38f0046d8e6514e675a1/pip-19.2.3-py2.py3-none-any.whl (1.4MB)
100% |████████████████████████████████| 1.4MB 6.9MB/s
Installing collected packages: pip
Found existing installation: pip 19.0.3
Uninstalling pip-19.0.3:
Successfully uninstalled pip-19.0.3
Successfully installed pip-19.2.3
[root@study ~]# pip3 -V
pip 19.2.3 from /usr/local/python3/lib/python3.7/site-packages/pip (python 3.7)
三、获取应用源码
拷贝后端python代码到:/home/www/server
拷贝前端iview框架代码到:/home/www/web
设置目录权限:
chmod -R 777 /home/
chmod -R 777 /home/www/
chmod -R 777 /home/www/server
chmod -R 777 /home/www/web
五、安装MySQL5.6数据库--在线安装
在CentOS中默认安装有MariaDB,这个是MySQL的分支,但为了需要,还是要在系统中安装MySQL,而且安装完成之后可以直接覆盖掉MariaDB。
1 下载并安装MySQL官方的 Yum Repository
# wget -i -c http://dev.mysql.com/get/mysql57-community-release-el7-10.noarch.rpm
使用上面的命令就直接下载了安装用的Yum Repository,大概25KB的样子,然后就可以直接yum安装了
# yum -y install mysql57-community-release-el7-10.noarch.rpm
之后就开始安装MySQL服务器。
# yum -y install mysql-community-server
这步可能会花些时间,安装完成后就会覆盖掉之前的mariadb。
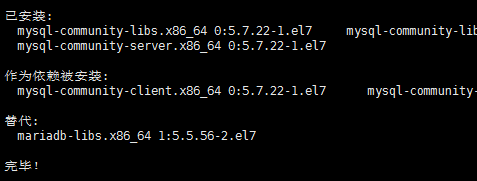
至此MySQL就安装完成了,然后是对MySQL的一些设置。
2 MySQL数据库设置
首先启动MySQL
# systemctl start mysqld.service
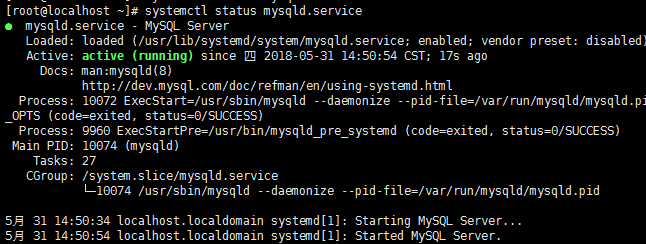
查看状态
# systemctl status mysqld.service
如下命令进入数据库:
# mysql -uroot -p
输入初始密码(是上面图片最后面的 no;e!5>>alfg),此时不能做任何事情,因为MySQL默认必须修改密码之后才能操作数据库:
mysql> ALTER USER 'root'@'localhost' IDENTIFIED BY 'new password';
其中‘new password’替换成你要设置的密码,注意:密码设置必须要大小写字母数字和特殊符号(,/';:等),不然不能配置成功
3 开启mysql的远程访问
执行以下命令开启远程访问限制(注意:下面命令开启的IP是 192.168.0.1,如要开启所有的,用%代替IP):
grant all privileges on *.* to 'root'@'192.168.0.1' identified by 'password' with grant option;
然后再输入下面两行命令
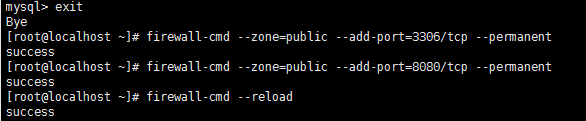
mysql> flush privileges;
mysql> exit

4 为firewalld添加开放端口
添加mysql端口3306和Tomcat端口8080
[root@localhost ~]# firewall-cmd --zone=public --add-port=3306/tcp --permanent
[root@localhost ~]# firewall-cmd --zone=public --add-port=8080/tcp --permanent

#然后再重新载入

[root@localhost ~]# firewall-cmd --reload
5 更改mysql的语言
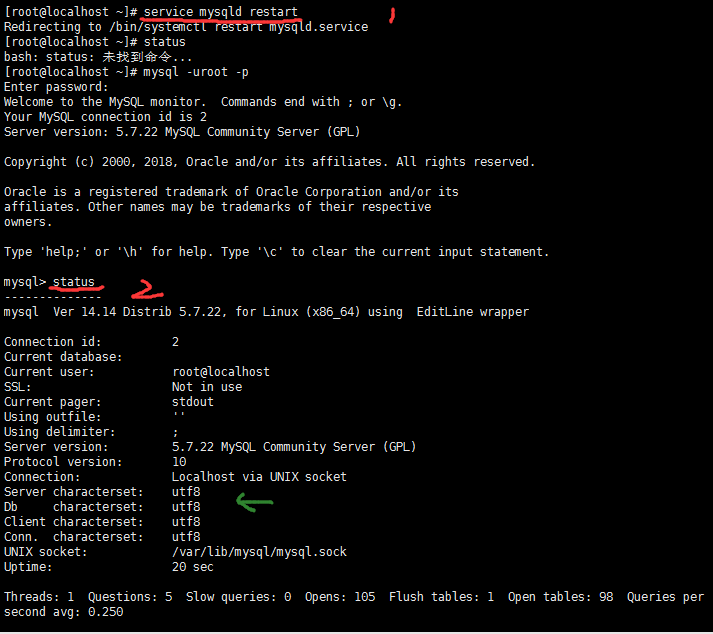
首先重新登录mysql,然后输入status:
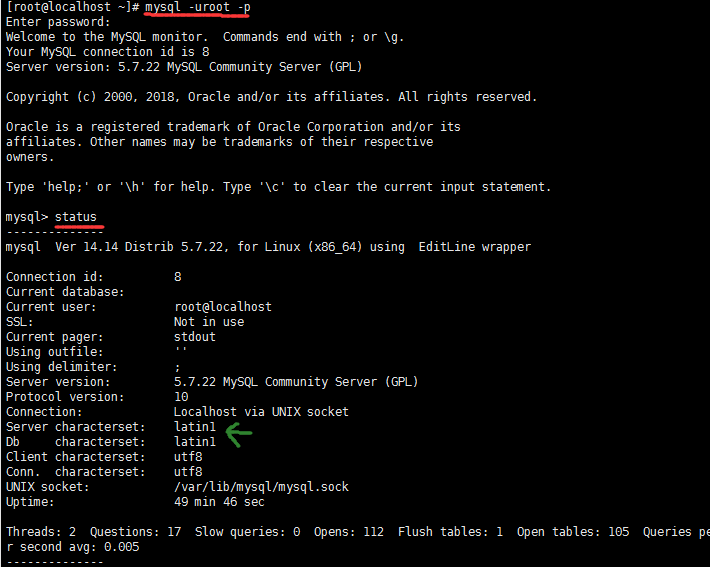
可以看到,绿色箭头处不是utf-8
因此我们先退出mysql,然后再到、etc目录下的my.cnf文件下修改一下文件内容

进入文件后,新增四行代码:
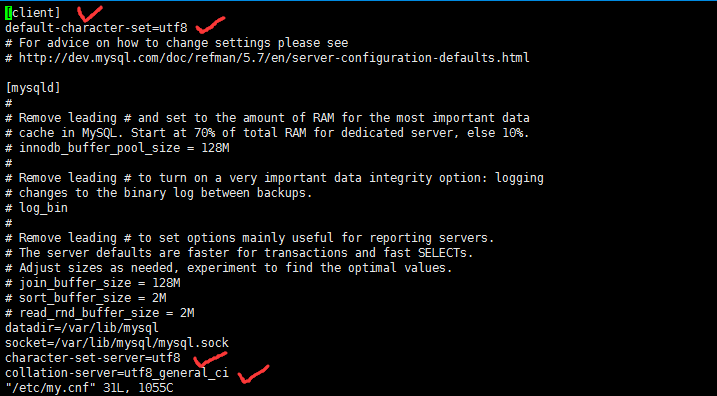
保存更改后的my.cnf文件后,重启下mysql,然后输入status再次查看,你就会发现变化啦
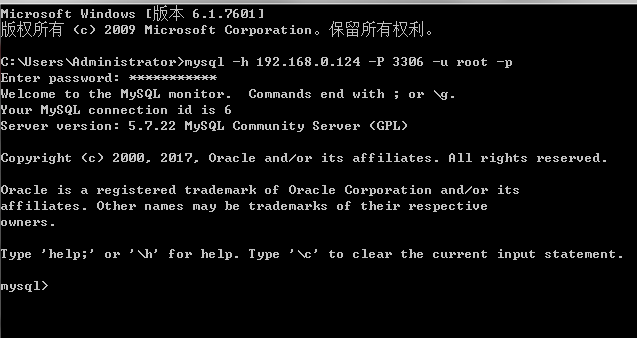
最后,到Windows下用cmd命令启动mysql啦!!
五、安装MySQL5.6数据库--离线安装
1、首先清除CentOS7系统中默认的数据库mariadb,否则不能安装mysql
rpm -qa |grep mariadb |xargs yum remove -y
2、下载mysql-5.7.23-1.el6.x86_64.rpm-bundle.tar文件
百度网盘链接: https://pan.baidu.com/s/1dGsP-LvIHnuD4FZ2VmsLAw 提取码: qu66
或者连接网络下载:
# wget http://dev.mysql.com/get/Downloads/MySQL-5.7/mysql-5.7.16-1.el7.x86_64.rpm-bundle.tar
3、解压 :
# tar xvf mysql-5.7.23-1.el6.x86_64.rpm-bundle.tar
4、安装(按照依赖顺序执行,一定要看对自己的版本使用tab键补全即可)
rpm -ivh mysql-community-common-5.7.23-1.el6.x86_64.rpm
rpm -ivh mysql-community-libs-5.7.23-1.el6.x86_64.rpm
rpm -ivh mysql-community-devel-5.7.23-1.el6.x86_64.rpm
rpm -ivh mysql-community-client-5.7.23-1.el6.x86_64.rpm
rpm -ivh mysql-community-server-5.7.23-1.el6.x86_64.rpm
5、常用操作
systemctl start mysqld.service
systemctl stop mysqld.service
systemctl restart mysqld.service
#查看状态
systemctl status mysqld.service
设置开机启动
systemctl enable mysqld
6、登录
1)使用my.cnf文件中自动生成一个密码
# cat /var/log/mysqld.log | grep password
2017-05-13T05:39:44.497086Z 1 [Note] A temporary password is generated for root@localhost: pKsO:Jin
密码:pKsO:Jin
2)使用root登录
#mysql -u root -p
Enter password:pKsO:Jin
3)修改密码
mysql>set password for root@localhost = password('li1268972');
4)修改安全级别
mysql> set global validate_password_policy=0;//0最低,1中级,2最强验证级别
5)创建普通用户:
create user ‘jirauser’ identified by ‘jiara123a’
用户jirauser,密码jira123a
六、安装Nginx服务器
1.安装并启动nginx
# yum install nginx
默认安装目录/etc/nginx/
# systemctl start nginx.service
2.配置nginx
(1)nginx.conf文件中user nginx;修改成user root;
也就是以root用户启动nginx,否则会报错: 13: Permission denied
(2)在vim /etc/nginx/nginx.conf 文件,修改如下内容
user  root;
worker_processes  1;
events {
    worker_connections  1024;
}
http {
    include       mime.types;
    default_type  application/octet-stream;
    sendfile        on;
    keepalive_timeout  65;
    server {
        listen       80;
        server_name  localhost;
        charset utf-8;
        root   /home/www/web;
        index  index.html;
        proxy_set_header        Host                    $http_host;
        proxy_set_header        X-Real-IP               $remote_addr;
        proxy_set_header        X-Forwarded-For $proxy_add_x_forwarded_for;
        location ^~ / {
                # 防止问题文件/CSS路径跨域
                add_header 'Access-Control-Allow-Origin' '*'; #允许来自所有的访问地址
                add_header 'Access-Control-Allow-Credentials' 'true';
                add_header 'Access-Control-Allow-Methods' 'GET, PUT, POST, DELETE, OPTIONS'; #支持请求方式
                add_header 'Access-Control-Allow-Headers' 'Content-Type,*';
                try_files $uri $uri/ @router;
                index index.html;

        }
        location ^~ /api {
                include uwsgi_params;
                uwsgi_pass 127.0.0.1:5000;
                #proxy_pass http://127.0.0.1:5000;
        }
        location @router {
                rewrite ^.*$ /index.html last;
        }

        #error_page  404              /404.html;
        #error_page   500 502 503 504  /50x.html;
        #location = /50x.html {
        #    root   html;
        #}
    }
}
3.常用操作nginx
# 启动
systemctl start nginx.service
# 停止
systemctl stop nginx.service
#重启
systemctl restart nginx.service
#查看状态
systemctl status nginx.service
# 开机启动
systemctl enable nginx
# 禁止开机启动
systemctl disable  nginx.service
# 启动服务:
start nginx

# 退出服务:
nginx -s quit

# 强制关闭服务:
nginx -s stop

# 重载服务:
nginx -s reload #(重载服务配置文件,类似于重启,服务不会中止)

# 验证配置文件:
nginx -t

# 使用配置文件:
nginx -c "配置文件路径"

# 使用帮助:
nginx -h
七、安装uWSGI
1.安装uwsgi
# pip3 install uwsgi
# ln -s /usr/local/python3/bin/uwsgi /usr/bin/uwsgi
2.配置uwsgi
在项目的根目录下,创建配置文件uwsgi.ini,篇日志如下内容:
[uwsgi]
master = true
socket = 127.0.0.1:5000
chdir = /home/www/server/
wsgi-file = server.py
callable = app
processes = 4
threads = 2
buffer-size = 32768
vacuum = true
daemonize = /home/www/server/logs/uwsgi_log.log
pidfile = /home/www/server/uwsgi.pid
八、启动uwsgi
1.启动uwsgi
# 启动1
uwsgi uwsgi uwsgi.ini

# 启动2
uwsgi --ini xxx.ini

# uWSGI 通过 xxx.ini 启动后会在相同目录下生成一个 xxx.pid 的文件,里面只有一行内容是 uWSGI 的主进程的进程号。

#### 重启:
uwsgi --reload xxx.pid

#### 停止:
uwsgi --stop xxx.pid

# 停止
uwsgi pkill -f -9 uwsgi
2、报错: no app loaded. going in full dynamic mode
配置plugin = python或者启动uwsgi命令:uwsgi config.ini --plugin python
3、配置服务开启启动
在centos7中,/etc/rc.d/rc.local文件的权限被降低了,开机的时候执行在自己的脚本是不能起动一些服务的,执行下面的命令可以文件标记为可执行的文件
chmod +x /etc/rc.d/rc.local
打开/etc/rc.d/rc.local文件,在最后面添加如下脚本
vim /etc/rc.d/rc.local

/usr/bin/uwsgi --ini /home/www/server/uwsgi.ini
3、检测进程并关闭
ps -ef |grep uwsgi

kill全部uwsgi ini进程  killall -s INT uwsgi
查看uwsgi有关的进程  ps -ef |grep uwsgi
启动uwsgi:  uwsgi --ini ./script/uwsgi.ini
九、配置uwsgi开机服务运行
1、概述
CentOS 7继承了RHEL 7的新的特性,例如强大的systemctl,而systemctl的使用也使得以往系统服务的/etc/init.d/的启动脚本的方式就此改变,也大幅提高了系统服务的运行效率。但服务的配置和以往也发生了极大的不同。
CentOS 7的服务systemctl脚本存放在:/usr/lib/systemd/,有系统(system)和用户(user)之分,像需要开机不登陆就能运行的程序,还是存在系统服务里吧,即:/usr/lib/systemd/system目录下,并且每一个服务以 .service 结尾。
Centos 系统服务脚本目录:
/usr/lib/systemd
如需要开机没有登陆情况下就能运行的程序,存在系统服务(system)里,即:
/usr/lib/systemd/system
2. 开始配置
2.1 环境 ===>
1. 添加自启动服务为:uwsgi
2. 自启动脚本以经写好
3. 本人将开机自启动的脚本放在 /etc/init.d/目录下,并加执行权限
vim /etc/init.d/uwsgid.sh

type=$1

if [ "X${type}" = "Xstart" ];then
    /usr/bin/uwsgi --ini /home/www/server/uwsgi.ini
fi
if [ "X${type}" = "Xrestart" ];then
    /usr/bin/uwsgi --reload /home/www/server/uwsgi.pid
fi
if [ "X${type}" = "Xstop" ];then
    /usr/bin/uwsgi --stop /home/www/server/uwsgi.pid
fi
chmod 777 /etc/init.d/uwsgid.sh
2.2 配置 ===>
每一个服务以.service结尾,一般会分为3部分:[Unit]、[Service]和[Install],我写的这个服务用于开机运行uwsgi项目,具体内容如下:
[root@tsingserver]# vim /usr/lib/systemd/system/uwsgid.service
[Unit]
Description=uwsgid
After=network.target mysqld.service nginx.service

[Service]
Type=forking
ExecStart=/etc/init.d/uwsgid.sh start
ExecReload=/etc/init.d/uwsgid.sh restart
ExecStop=/etc/init.d/uwsgid.sh stop
PrivateTmp=true

[Install]
WantedBy=multi-user.target
服务脚本按照上面编写完成后,以 754 的权限保存在/usr/lib/systemd/system目录下
[root@tsingserver system]# chmod 754 uwsgid.service
配置文件解释如下:
[Unit] ===> 服务的说明
Description:描述服务
After:描述服务类别
[Service] ===> 服务运行参数的设置
Type=forking:是后台运行的形式
ExecStart:为服务的具体运行命令
ExecReload:为重启命令
ExecStop:为停止命令
PrivateTmp=True:表示给服务分配独立的临时空间
注意:[Service]的启动、重启、停止命令全部要求使用绝对路径
[Install] ===> 服务安装的相关设置,可设置为多用户
--------------------------------------------------------------------------------
3. 设置开机自启动
systemctl enable uwsgid.service
4. 其他命令
以下以httpd服务为例
| 任务 | 旧指令 | 新指令 |
| 使某服务自动启动 | chkconfig --level 3 httpd on | systemctl enable httpd.service |
| 使某服务不自动启动 | chkconfig --level 3 httpd off | systemctl disable httpd.service |
| 检查服务状态 | service httpd status |
systemctl status httpd.service
systemctl is-active httpd.service 仅显示是否 Active |
| 显示所有已启动的服务 | chkconfig --list | systemctl list-units --type=service |
| 启动某服务 | service httpd start | systemctl start httpd.service |
| 停止某服务 | service httpd stop | systemctl stop httpd.service |
| 重启某服务 | service httpd restart | systemctl restart httpd.service |
启动uwsgid服务
systemctl start uwsgid.service
设置开机自启动
systemctl enable uwsgid.service
停止开机自启动
systemctl disable uwsgid.service
查看服务当前状态
systemctl status uwsgid.service
重新启动服务
systemctl restart uwsgid.service
查看所有已启动的服务
systemctl list-units --type=service
